Feel free to share
 Using this site means trees will be planted. ^.^
(Find out more)
Custom game master screen tips & tricks.
As mentioned in the main guide on creating a custom GM screen, this page will contain a wide range of tips and tricks to customize your own GM screen, as well as some ideas I've personally played around with during my creation process.
I've separated everything into categories ranging from storage to hinges and locks, and from painting on designs to other decorations. Hopefully they'll provide you with inspiration for your own customized GM screen.
Painting designs
In the main guide I already mentioned how using transparent sheets tends to work better than using paper, but there are other ways to put a design on wood (or other materials) as well.
One such method is to "print" them on. I've tried this myself, but have had mixed results, and I wasn't happy enough with any of them. But this method does depend a lot on your printer and the type of wood you use.
To "print" on wood you'll need some freezer paper, which is like oven paper, but it has a plastic coating. In theory oven paper could work too, but since these generally have a wax coating of some sort, they often absorb some of the ink, which you don't want. You could also use the other side of the printable transparent sheets I used for my design stencil. Usually only one side is printable (the coarse side), while the other side is not (the smooth side). You'll also need wood that has been sanded smooth, this'll allow the ink to be absorbed more evenly.
Before you print your design on your chosen paper/sheet, mirror it in an editing program. Then print it. Note that this must be done with an ink-jet printer (not a laser printer!), as you need the ink for this to work. Be careful when picking it up, and put it on a flat surface. Now you want to gently, and very carefully place your wooden panel on top of the printed design. Carefully press it down evenly all around the paper, then pull off the wood. You could leave it on for a little while instead, just to give the ink more time to soak into the wood, but this shouldn't be needed.
Since the printed ink doesn't get absorbed by the plastic coating, the wood will be able to soak up all of that ink, and, ideally, take up the entire design. It will appear mirrored from what you printed, which is why you had to mirror it in the first place to counter this.
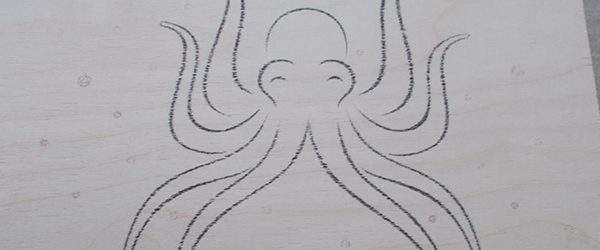
I've tried this method several times. I never got a result I was satisfied with, but I do know this method can work, as I've seen it work. It's also a very tricky method, as you only have one chance to get it right. Any mistake in positioning the design, any shift while pressing the wood on the ink, or any other similar mistake will likely ruin things. However, this method does offer one big advantage. Even if the design hasn't soaked in well enough, it does leave a big enough mark, which means you can then very easily do some touch ups with a brush and some paint. This is ideal for designs with a lot of loose parts you wouldn't necessarily be able to turn into a cut-out.
The image below is the result of one of my many attempts.
Other methods of adding a design on wood include simply free-handing it, wood burning, using stamps, using stickers, glitter, or other decorative materials, using existing stencils (like letter stencils), or simply buying decals with a design you like.
If all else fails, you could always just glue a poster to your screen. If you do it cleanly, it can look amazing too.
Other decorations
Speaking of stickers, glitter, and other decorations, there are far more ways to spice up a GM screen. Adding a border, for example, can be a great way to add an extra dimension to your screen. This can be done in many ways too. A ruler and a sharpie, or some decorative tape are just two examples. Perhaps you want to really make things pop by painting the borders of your screen with glow in the dark paint. Or perhaps some of the elements of your main design could do with some glow in the dark paint touches as well.
(Fake) gems can make for great looking corner pieces, or perhaps fantasy themed eyes for whichever creature you picked for your design.
Metal corner brackets, the ones used to protect corners, can give your GM screen a very rugged look too. These metal corners come in all shapes and sizes too, some have floral patterns to perhaps accentuate an elvish look, while others are made to look worn for a more antique look.
Speaking of rugged looks, you could add loose chains to the front too. Or if you want to get really fancy, attach some candle holders to the front. Do make sure your screen remains balanced with this added weight, the last thing you want is for your screen to topple over when candles are burning. To be even safer, just use LED candles.
Hinges and locks
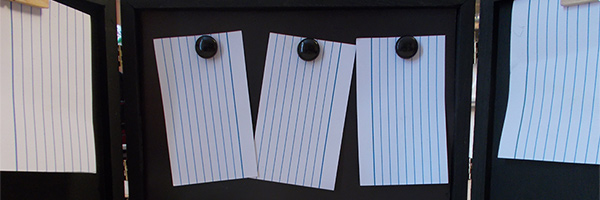
To continue with the metal theme, let's talk hinges and locks. There's far more you can do than using simple metal hinges. Magnets, for example, are a popular method of connecting GM screen panels, as they allow for more customization. Don't need a panel? Just take it off. Want to add more? Just click them on.
This does require a little more expertise (if you want the magnets to be hidden inside the wood), and strong enough magnets, but it can definitely be done.
You can also use small chains, ideal if you want to continue that rugged look, which could also allow you to customize the screen layout if the chains come with clips, which allow them to be unhooked.
As far as locking mechanisms go, there's a whole range of possibilities. No lock at all is always an option, but I definitely recommend putting something on there to make sure everything stays together. It makes carrying notes and other items on the inside a lot easier too.
You can go for magnets here as well, you could go for padlocks, latch hooks, clasps, belts, or, if you're capable enough, an actual key lock.
Alternatively, put two knobs or hooks of some sort on the front. Now you can keep it closed with an elastic band or a good looking string or cord.
Alternatively, combine using knobs with a magnet system to make it look stylish without sacrificing the ability to firmly close your gm screen.
Storage
Perhaps the most crucial part, and, to me, the most fun part, is the storage part of a GM screen. In my final GM screen I used clothing pins and a cork-board, but there's far more you can use. As I mentioned in the main guide, I've played around with using a magnetic sheet as well. It worked well enough, and looked good too, but the magnetic sheet just wasn't strong enough for my liking. When I wanted to pin more than just a few sheets of paper in one spot, the magnetic strength just was not strong enough. This can obviously be fixed by getting a stronger sheet.
The advantage of a magnetic sheet over a cork-board is that it allows for easy shifting of magnets (obviously). Which may seem like a trivial advantage, but having color coded magnets could make keeping track of things like initiative order very easy, which is why I was still really tempted to put the magnetic shield in one of the side panels.
Speaking of panels, the ones I picked weren't picked just because they were cost effective. The panels I picked have raised edges on one side, which means there's a whole lot of space on the inside. This is perfect for storing dice, pencils, and other items inside, and illustrates why having a good locking mechanism can be so important. But this space can be used in other ways too.
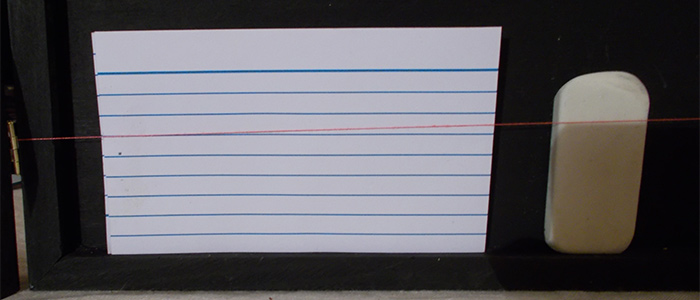
You can also attach a string or cord on either side of a panel to have something to keep all sorts of items in place, like in my very crude, temporary version in the image below.
Other ways of storing notes, items, and other elements include clasps, (clipboard) clips, blue tac, building special containers (simple piece of wood as a divider often does the trick), and, of course, plastic sleeves.
Plastic sleeves are great not just for storing, but if you attach them to the front, either permanently with glue, nails, or something else, or temporarily with magnets, clips, or something else, you'll be able to slide in a map, a mysterious letter, an image of some ancient artifact, or something else entirely. This is also a neat way of being able to change the cover image of your screen on the fly. Simply replace whichever image is in the sleeve. The plastic itself can look a little cheap though, but that's a subjective decision you'll have to make yourself.
Final note
I hope these ideas have unleashed some creative juices in you, and, more importantly, I hope you're able to create the GM screen you wish to create. It can be a lot of fun, and, once you've created something you're happy with, the satisfaction is a great boost too. Just remember that most of the mistakes you make can be undone, so if you do make a mistake, keep calm and keep on creating.