Feel free to share
 Using this site means trees will be planted. ^.^
(Find out more)
Making salt crystals.
Salt crystals are a great way to add a physical currency to a tabletop role-playing game, but they can also be used for all sorts of other purposes, and they're just fun to make. It's definitely a tricky process, at least depending on the type of crystals you wish to grow, but to many the biggest challenge might simply be the long wait.
Parental guidance: Use of a stove, use of large quantities of salt, potential use of food coloring, hot/boiling water.
Difficulty: Moderate to hard.
Time: Initial setup takes about an hour or so, growing the crystals can take days and weeks.
Cost: Cheap
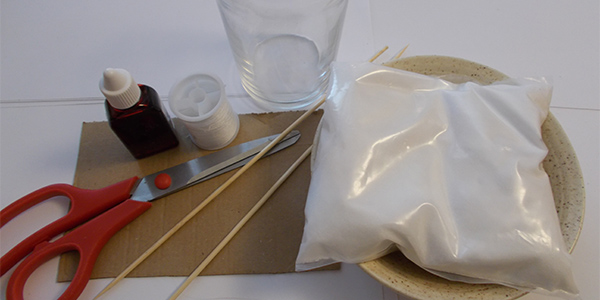
Materials: Salt (see info in instructions), water, pan, glasses, string, skewer or other long object, scissors, piece of cardboard or something else to cover the glass with.
Optional materials: Food coloring, clothing pin, coffee filters or sponges
Instructions
The first thing you'll want to do is gather all the materials you need. Make sure the glasses are clean, make sure you have room in your kitchen, and make sure the clothes you're wearing aren't dear to you if you're using food coloring, they can leave permanent stains.
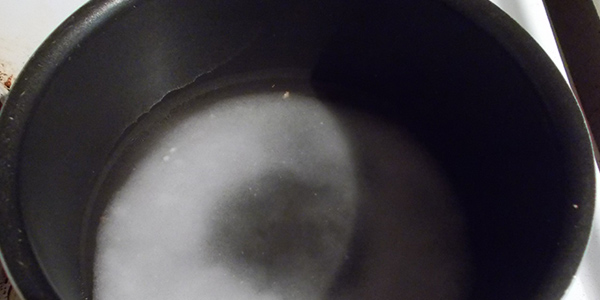
Put some salt and water in a pan, then heat it gently. The amount depends a lot on how big a crystal you intend on growing, the size of your glass, and, to some degree, where you live (climate, altitude, etc.), but you'll generally want to start with at least a quarter of a cup (about a handful) of salt, and enough water to cover it. You'll be adding more soon, so make sure you have a good supply left.
As the water heats up, and the salt starts to dissolve in the water, add more salt. Keep adding little amounts, until eventually you'll no longer be able to dissolve any more salt in the water. You're creating a saturated solution of the salt you chose, which is the most important step. If the solution isn't saturated to the point of no longer being able to dissolve more salt, the salt growing process will either fail, or go incredibly slow.
Note that the hotter the water gets, the more salt can be dissolved. But it also means the salt will solidify very quickly when it cools down again. This can be desired, but I personally found it easier to keep the water below a simmer. Just hot enough to see the occasional bubble, but cool enough to not actually bubble.
Once you've reached the right stage, which is when salt remains at the bottom, take the pan from the heat, add the food coloring you wish, and pour it in the glass. You'll want to add a good amount of food coloring, and liquid versions often work better than solid versions, but the more you add the harder it can be to see the growing crystals. This isn't a huge hurdle though.
While pouring the liquid into a glass you can pour it through a coffee filter or sponge. A filter works better, but both will filter out some impurities which may be left in the liquid, which will help with the growing process.
Leave the liquid to cool, which will cause crystals to grow. They'll grow incredibly fast initially, but if you're after bigger crystals, you're far from done.
At this stage you're after a single crystal, which you'll use to turn into a bigger crystal. So once the liquid has cooled, and crystals have begun to form, poor the liquid into a different, clean glass, and sift through the formed crystals. Try to find the best formed one, the others can either be crushed and dissolved again at a later date, or used for other purposes. They look great, even if they are tiny.
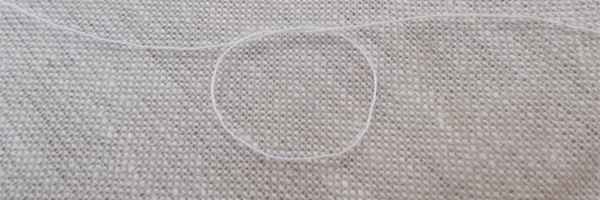
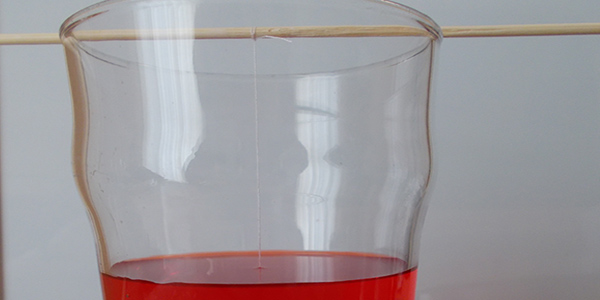
Now get your string, and form a loop like in the picture below. This'll help with tying the crystal to the string. Gently place the crystal in the loop, and carefully pull it. You want the string to carry the crystal, so you may need to loop around once more. Try to use minimal amounts of string though, it'll keep the crystal itself looking cleaner.

Once you've managed to tie a string around the crystal, hang it inside the liquid, and tie the other end of the string to a skewer or other long object (pens, pencils, forks, they all work). If you want to make sure the string stays attached to the object, use a clothing pin to keep it in place.
Cover the glass with a piece of cardboard, a paper towel, or anything else you have at hand. You want to prevent dust and other impurities from falling into the glass, as all impurities in the water will cause other crystals to grow. You don't want this, you want all the salt to attach to the one on the string, and thus form a single crystal.
The hard part is now done. It's time for the waiting game. As the water evaporates, salt will begin to attach to the crystal in the water. The more water evaporates, the more salt will attach to the crystal. Any food coloring you added will also be captured, but it's an unpredictable process, which depends on the type of food coloring, the type of salt, and other factors.
This growing process is a delicate one, and depending on where you live it can take a very, very long time before you have a crystal of a decent size.
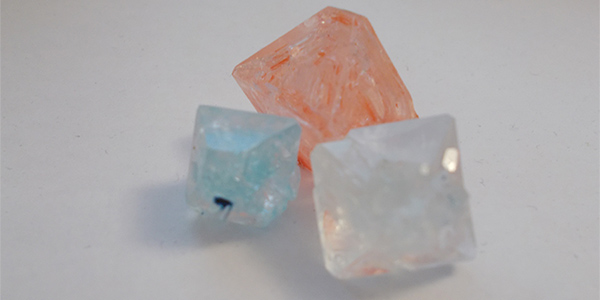
The ones I made took about 5 weeks for the red one, 4 weeks for the white one, and 3.5 weeks for the blue one (water wasn't saturated enough).
Don't try to speed up the process by warming the water, putting it in front of a radiator, or anything like this, it'll cause the crystals to grow brittle, ugly, and jagged. I tried.
Every day or so you'll want to pour the water into a new glass, but make sure the residue at the bottom isn't poured with it. There'll often be small salt crystals at the bottom, which is why you want to pour the water into a new glass, otherwise those crystals will grow, and slow down the growing of the main crystal in the process.
Salt types
You can use all sorts of salt types for this, and you'll often get different results too. Iodized salt, non-iodized salt, alum, epsom, and so on. Sugar works too, and I've written a separate guide on growing sugar crystals, found here.
I used alum for the crystals in this guide. Alum's usually widely available as it's used for many day to day purposes, some use it after shaving for example.
Tips
It's difficult to get a pure, transparent crystal, but to increase your chances here are a few tips:
- The crystal you pick initially, the one you tie to a string, will greatly influence the growth of the crystal overall, so the better this starting crystal, the better your chances.
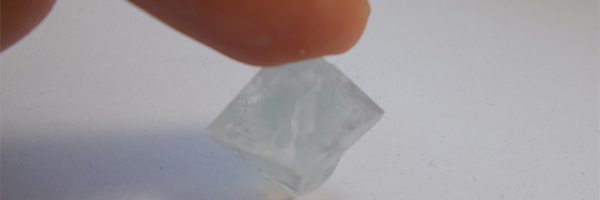
- The salt you pick can help immensely too. The purer the salt, the bigger the chance of a fully transparent crystal.
- Water has impurities too. Try using distilled water instead of regular tap water.
- Strings will act as a place for crystals to grow as well, but if you use fishing line you'll prevent salts from attaching.
- Speaking of strings, if you're not using fishing line, try to match the string to the color of crystal you're making, this way it'll be less visible inside the crystal.
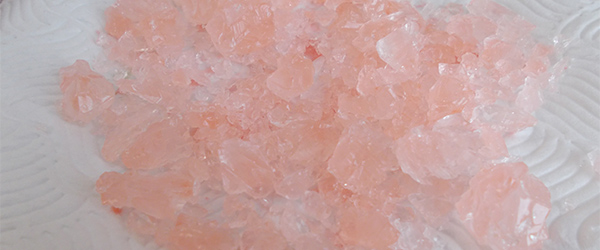
Rugged looking crystals can make for great crystals too, crystals which can offer all sorts of impurities. When I first tried to create a crystal I left the water too long before picking the first crystal for the string. The entire bottom of the glass was one big layer of salt crystal, which was difficult to get out, but it did give me a big handful of rugged looking crystals, as seen in the image below. They look great around candles.
Since the crystals will grow on anything they can find in the water, you could add dice, figurines, or anything you wish in the water, and watch it become covered in crystals. It could make for a fun prop, for example.