Feel free to share
 Using this site means trees will be planted. ^.^
(Find out more)
Custom game master screen.
Game master (GM) screens are often a helpful tool in many tabletop games, but while paper ones are cheap, they're often flimsy, and while wooden ones are often sturdy and good looking, they can be really expensive. In this guide I'll cover everything I did to create my own, cheap GM screen. Since there are a lot of ways you can customize your GM screen, I've written a second 'tips and tricks' guide as a second part to this guide, which you can find here. Below you'll find the guide on how to create the GM screen I made.
Parental guidance: Potential use of hobby knives, scissors, electric tools, hammers, super-glue, paints, and varnish. (Varies from project to project.)
Difficulty: Easy to moderate.
Time: Roughly an afternoon or so, it varies from project to project.
Cost: Anywhere from cheap to expensive, depends on the materials you wish your screen to be made out of. My GM screen cost me about $25/€21/ £19
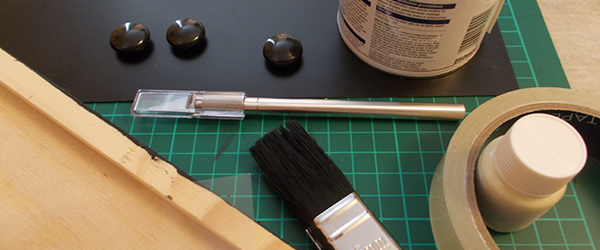
Materials: (For my screen.) Wooden panels, nails/screws, hinges, latch hook, screwdriver, paint, varnish, paintbrush, paper/printable transparent sheet, printer, cork-board, clothing pins, thumbtacks, ruler, pencil, hobby knife, cutting mat.
Optional materials: Magnetic sheet, magnets, super glue, spray paint, anything else you wish to use to decorate your screen with (see tips and tricks).
Instructions
First, find a working space with enough room to work in. Gather all your materials to make sure you have everything, then grab your wooden panels, and paint them in the colors you wish. I used black school board paint, partially because I like the color and texture, but also because it allows me to write notes in chalk on the inside of my screen.
After you've painted your wooden panels, grab a piece of paper or a printable transparent sheet to print your chosen design on. I highly recommend getting the transparent sheets, because you will be using these as stencils to paint with. Paper definitely works, but it can get soggy, and then it'll stick to your wooden screen. This isn't a huge issue in most cases, but it'll often require more touching up afterward.
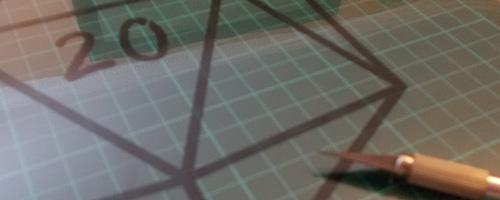
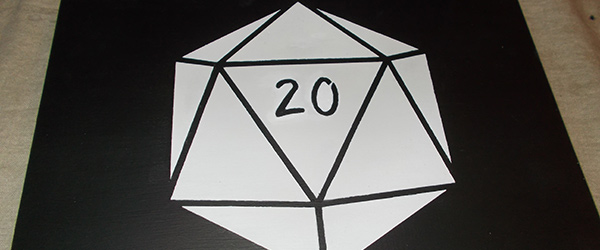
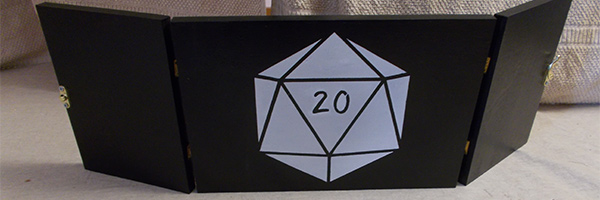
There's one more crucial element you'll need to pay attention to. To get the best results, your design must be able to be cut out without ending up with loose pieces. Take my D20 design as an example. I cut out all the inner rectangular elements, which left me with a single sheet I was able to use as a stencil. If I wanted just the outlines of the dice, I would've had to carefully place the inner shapes on the wood. They wouldn't be connected to anything, so it would be very easy to accidentally shift them slightly, which could potentially ruin the design.
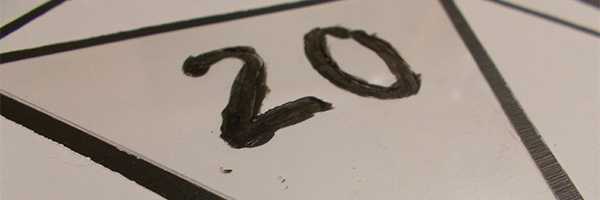
It's not impossible though. For example, I painted the 20 by placing the cut-out rectangle on top of the painted rectangle. Note that I made sure there was a split in the 0 to make sure the inside of the 0 wasn't a separate element I had to carefully position as well.
So, with the design sorted, all there's left to do is print it (or draw it if you wish), then cut out the design along the lines of the design. Note that you only need to print the lines you'll cut along, so, to save ink, you can leave the insides of the shapes white, something I forgot to do during my transparent sheet try, but did do when I tried the paper design, as you can see in the picture below.
I highly recommend using a hobby knife, but, depending on your design, you could technically use scissors as well.
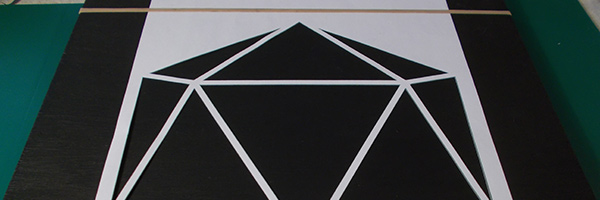
Once you've cut out your design, fasten it to your wooden panel. Make sure it can't shift, or else you might end up with a crooked looking result. Simple tape does the trick, but I recommend using masking tape as it'll generally let go easily, which means you won't have to touch up any paint that might come off when using normal tape.
Now it's time to paint your design on. You can do this with just regular paint and a brush, you could also use spray paint to get a more equalized coating.
You might need to paint several layers, but this depends both on the paint you're using, the look you're going for, and so on.
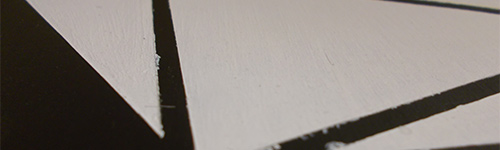
As you can see in the image above, I had to touch up some of the edges. You can take a few steps to prevent the amount of touching up you have to do. The first is to make sure your design cut-out is pressed well against the wood when you paint. In my case this wasn't always that easy due to the thinness of some of the cut-out's lines.
Painting carefully along the lines with a brush can also help, and spray paint will usually give a fairly clean result as well.
As mentioned before, I wanted a 20 in the center, which I painted on after the white die was painted. Being careful and keeping constant pressure on the cut-out helped make sure it didn't shift and mess up everything.
After painting everything you might wish to add a layer of varnish to avoid stains in the future. I only did the outside of my screen as I want to be able to draw on the insides with chalk.
Make sure your paint has dried completely before putting on a layer of varnish, or else you might create smudges that will be very difficult to fix.
All there's left is putting on the hinges, the lock, and the mechanisms you want on the inside. I started by putting on the hinges first, which is a simple job of measuring the side of your main panel, then using this measurement to figure out a good distance to put the hinges at. You could eyeball this, but when you're dealing with 3 panels in total, some measuring work can help make sure things look at least a little symmetric.
Depending on the tools you have at your disposal, putting on the hinges and the lock can be difficult. Some woods can make screwing in screws difficult without electric tools for example, and some woods can crack or split when the wrong screws are used. So make sure you have the right tools for the job.
Alternatively, depending on your hinges, you could use super glue or another type of glue designed to stick metals to woods.
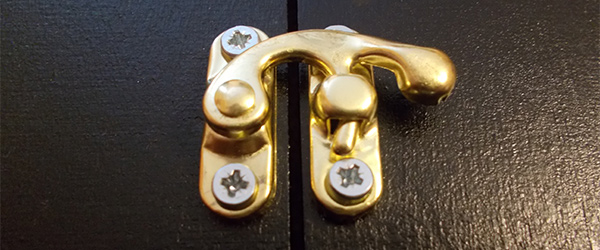
Repeat the same process for the locking mechanism you've picked. I chose a latch hook system, but you could use all sorts of locking mechanisms.
Now you should be able to fold your GM screen close, and be able to lock it. But the inside could do with some love, it's supposed to be able to hold notes after all.
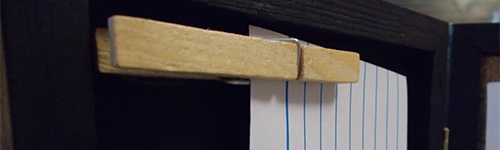
I used clothing pins on both of the sides. They're incredibly simple, but incredibly effective. Simply super glue one side to the wooden panel, and you'll be able to quickly and smoothly hang notes on the inside. But, perhaps more importantly, this simple system also allows you to take the notes out again really easily, so if you have handouts to give, there's no fumbling involved.
Note that smaller clothing pins can look great, but they can also be very flimsy. So keep that in mind when picking a pin for your sceen.
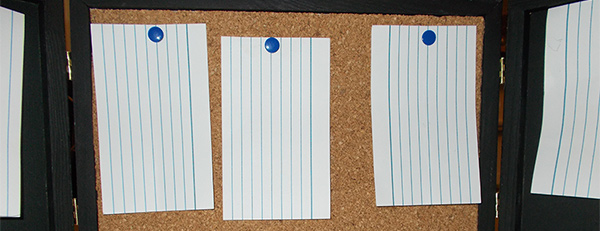
Last but not least, the center panel. I bought a really cheap cork-board, which is actually just a piece of cardboard with a really thin layer of cork glued to it. I cut a piece equal to the inside of my wooden panel with my hobby knife, and simply pushed it inside of the panel. Since it's a snug fit, the cork-board will stay put, even when pulling out thumbtacks. You could glue it to the wood, but I personally like the versatility of not gluing it gives me. I can remove the cork-board easily in the future, either to replace it, or to use the wooden panel to draw on with chalk thanks to the school board paint.
I played around with other ideas too, like a magnetic sheet instead of cardboard. I've put these ideas and some other tips and tricks in a separate, part two style guide, as mentioned before.