Feel free to share
 Using this site means trees will be planted. ^.^
(Find out more)
Making expanding cards.
In this guide I will be covering how to fold a piece of paper into something that can easily be folded open again in a fun and potentially impressive looking way. The possibilities for these creations are endless, but in this guide I will stick to creating a small chest card, and in the second, Dr. Who themed part I will cover how to create a tardis card with these expandable contraptions in it.
But there's so much you can do with these, from creative loot cards in a tabletop game, to spicing up holiday cards, or from hiding something within these contraptions to creating a fancy way of folding a (fantasy) map. The folded result looks a little like a monstrous mouth too, so that could be something to expand upon as well.
But, as I mentioned, the main idea in this guide is a chest card, and the idea behind it is to use those as a more fun and creative way of presenting loot to players at the end of a tabletop campaign. You could write the loot on the inside, or you could put small pieces of paper in the folds, so when a player opens the chest and, in doing so, unfolds the hidden mechanism, the loot will fall out of the chest.
Parental guidance: None needed.
Difficulty: Easy.
Time: 10 minutes
Cost: Cheap.
Materials: Piece of (square) paper.
Optional materials:
Instructions
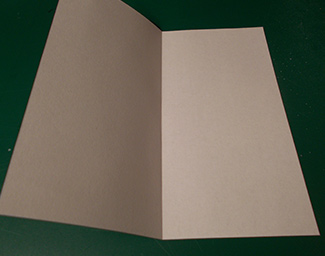
The main mechanism is incredibly easy to create. First you'll want a clear working surface on which you can easily fold paper. Grab a piece of square paper, then fold it in half from one side to the other. Note that while you can technically use other shapes of paper, square is definitely the easiest and cleanest looking. It's also far easier to manage.
Whenever you make a fold, try to make it as straight as possible, this'll make all the other steps easier, and also makes the end result look neater. Don't worry too much about it being absolutely perfect though, it's not an absolute requirement.
After folding the paper in half, fold it in half again, but this time from opposite corner to opposite corner, so you're creating a triangle.
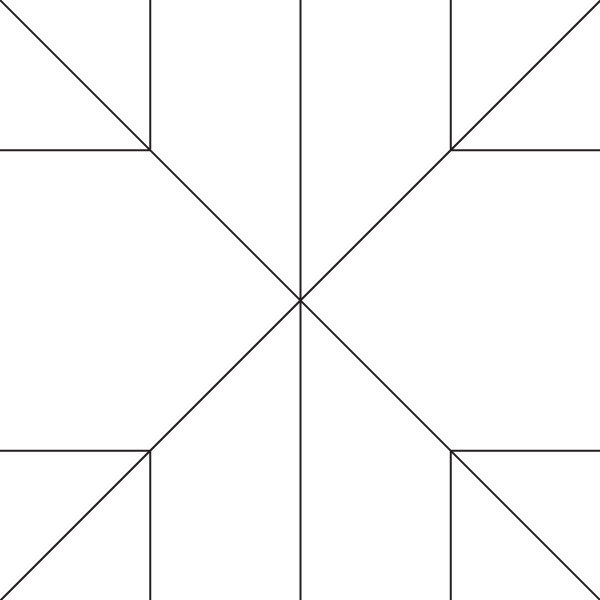
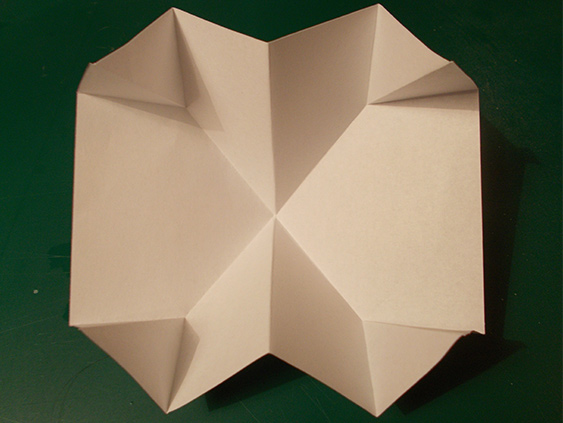
Fold it open, and repeat this again with the opposite side. When the paper is folded open completely, you'll see a fold resembling a cross with 1 line through it, like in the second image below.

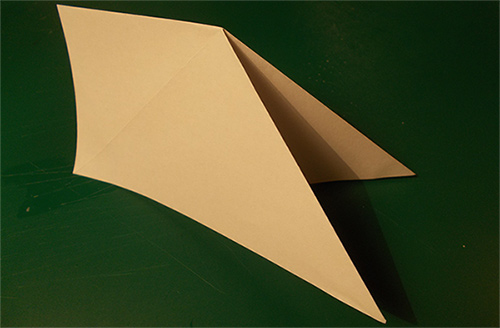
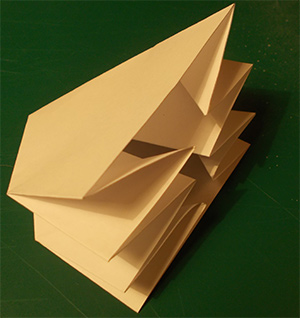
Now fold the paper in half again along the same line you did in the first step, so along the straight fold that's already there (the horizontal line in the image above). Then take one corner, and push it inward. The folds you've made in the previous steps will make this easier, and you'll notice the paper will naturally slide into a specific position. You'll end up with something that looks like the image below.
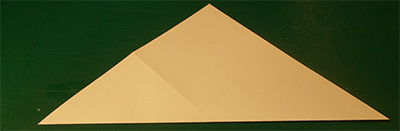
Repeat the same step with the other corner, and you'll end up with a triangle shape.
Take one of the sharp corners, and fold it until halfway down the triangle. To make this easier you could either measure and draw a line in the center, or keep an eye on the already existing folds sandwiched underneath.
Repeat this for the other corner, then flip everything over, and repeat this process for the other two corners.
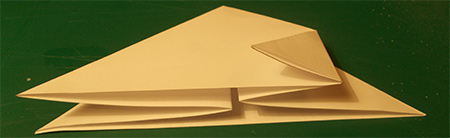
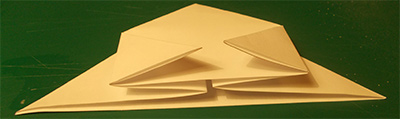
Now fold one of the corners outward again, then push it inward like how you did earlier with the bigger triangle shape, and like in the images below. Do this for all 4 corners.
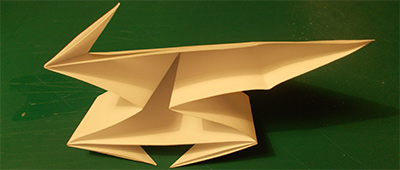
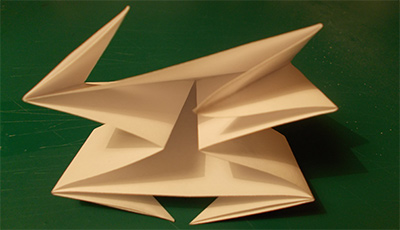
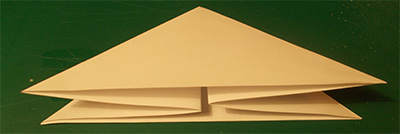
You're done! Assuming the folds are strong enough, you should now be able to pull the wider sides of your creation away from each other, and the paper will fold itself open. Push them toward each other again, and the paper should fold neatly into itself. The final result should look a little like the two images below in their open and folded states.
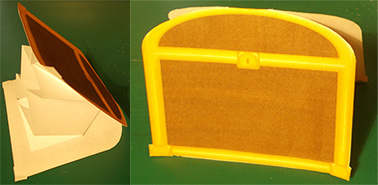
Now for the chest, all I did was grab a picture of a chest, in this case one I had already made months ago for this site, copy it, then flip the copy upside down. I attached the upside down copy to the top of the regular one, then print it out. I then cut out the chests, making sure not to cut through their attached tops, then fold it all in half, and ta-da! Chest card.
All there was left to do then is glue the two edges of our folding mechanisms to the inside of the chest card, and ta-da! Chest card with expandable insides!
This contraption can be applied to pretty much whatever you wish. A holiday card, a bag-of-holding item card, or a wide range of geeky cards, like a Dr. Who tardis card, a Pokeball, Hermione Granger's handbag, the wardrobe from The Lion, The Witch, and the Wardrobe, Marry Poppin's bag, or anything else that is bigger on the inside.
But before you start to let loose your inner creative monster, here are some tips and tricks.
- Thin, regular paper works best for the folding mechanism, but the outer cards are best made of a thicker kind of paper. This keeps the end result firm and more durable.
- You can scale the creation up and down as much as you wish. You could even glue small versions inside a large version for even more folding dimensions.
- Note that the final result will be half the length and width of the paper you started with (assuming you use a square piece of paper). So if you're unsure what size paper you need to adjust a festive card, measure the shortest part of the card, then double that size. So if a card, when folded close, is 18 x 8, you'll want to use the 8, double it to 16, and ideally take of just a little bit to leave some wiggle room. So a square piece of paper of 15x15 or 15.5x15.5 would be ideal.
- If you want to add text to the paper, try to keep in mind the folds of the paper. I've added a template below, you can either recreate that in an image editing program, or simply copy paste it, then add whatever you want to be in your folded creation on top of that. It's usually best to avoid using the corners.
Make sure to remove the template again for a cleaner result, or keep them in to perhaps make folding a little easier.
I've used this method in the Dr. Who tardis card, and I think it worked out great.