Feel free to share
 Using this site means trees will be planted. ^.^
(Find out more)
Customizing glasses
A game night usually involves drinks, and what better way to drink your beverage of choice than with customized glasses? It could make for fun and creative gifts as well, and it's a great way to spice up old glasses you've got around the house, as well as a way to up-cycle glass jars or other glass containers.
The technique I used in this guide is glass etching with glass etching cream. The process is simple in theory, but I did run into some challenges here and there, which I'll cover in this guide of course. Hopefully with my tips, tricks, and lessons from my mistakes, you'll be able to customize your own glasses without much difficulty. At the very least I recommend reading the entire guide first. It's usually best to do that with any DIY project, but with something like this it's especially true.
Parental guidance: Not suitable for children. Use of chemicals that could cause burns and other injuries.
Difficulty: Easy to moderate.
Time: 30-60 minutes.
Cost: Fairly cheap for customized glasses, but it depends a little on whether you buy new, (expensive) glasses, how much cream you'll need for your design, and so on.
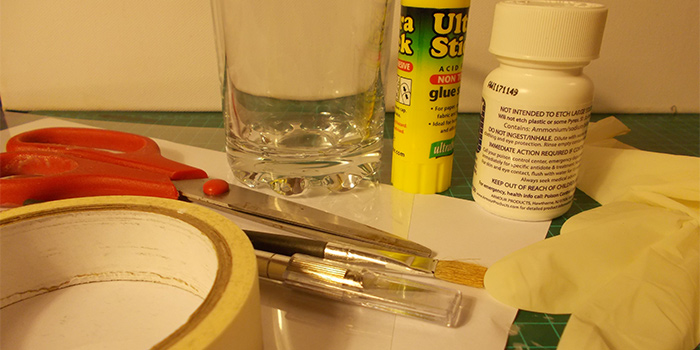
Materials: Glass, glass etching cream, hobby knife or scissors, paper or transparent sheets, glue-stick and/or masking tape, cutting board, gloves, mouth mask, brush.
Optional materials: Printer, pencils.
Instructions
First things first: safety. When using the cream, make sure you're wearing gloves, make sure you have something to cover your mouth, and wearing old, preferably loose clothing would help in case you manage to spill some drops of cream on your clothes. It's unlikely this'll happen, but better safe than sorry.
Make sure you have a clear working space, away from any pets that might bump into you, and gather all your materials.
Print or draw the design of your choice. Note that you'll need to be able cut the design out, so incredibly elaborate designs aren't always a viable option. I highly recommend using a hobby knife for more precision, it will pay off. For simpler designs you can use scissors.
Note that you do not have to mirror your design as you'll be painting the cream either on top of your stencil or into your cut-out, depending on the way you wish your result to look. There are two ways you can go about it, and to illustrate it take a look at the two examples in the image below.
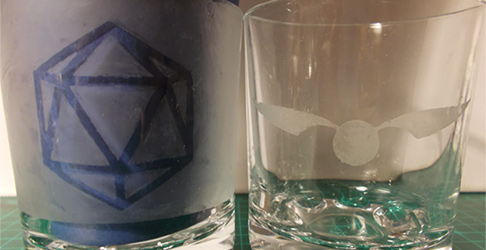
As you can see, you could go for either just the design (golden snitch on the right), or you could go for an inverted look (dice on the left) where the design itself is the only thing not etched. The first obviously uses less cream, and is thus cheaper. I highly, highly recommend going for the first design when you start off. If you make a mistake, you could always go for the inverted design by simply painting over the mistake. It won't be perfect, as you can usually still vaguely see the design you etched on first, but it's an effective way of salvaging glasses. By keeping the old design on the opposite side of the new, inverted design, it becomes less noticeable as well.
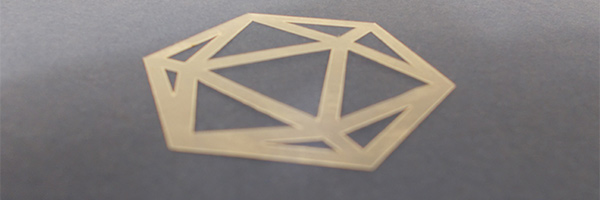
So, after you've drawn or printer your design, try to cut it out without destroying any of the parts, that way you can create both types of designs. This also offers an opportunity to create two glasses with the same design, but as inverted copies of each other, which looks great as a set.
As far as the material you put your design on goes, paper is usually easiest for cutting out more intricate designs thanks to its relative softness. However, the paper stencil will be lost after its first use. I used transparent printable sheets in this guide, which allowed me to reuse the design over and over, but they are trickier to cut. The jar with the Zelda design (see photos at the bottom of the page) was done with a paper stencil.
It's now time to get the design on the glass. I highly, highly recommend using a glue-stick to just glue on your stencil. You want every part of your design to stick to the glass. Every corner, every thin tip, and every small, separate piece. If the etching cream can seep under the stencil, it will etch that part, which can make the end result look a little wonky.
The advantage of glue-stick glue is that it allows you to move the design a little after putting it on the glass, so if you accidentally put it on at an angle, simply shifting it carefully should fix it. It's also a glue that is easy to remove, so if you do move your design, a wet q-tip usually does the trick when you need to remove any smudges.
It's time to put on your gloves and other protective equipment, and grab your glass etching cream. Make sure you follow the instructions and warning labels, as not all creams are the same.
Simply cover the glass with the cream, let it sit for however long the instructions dictate, then wash it off with (warm) water, and you're pretty much done.
I did experiment a little more, as well as run into some challenges. For one, the given time didn't always work out perfectly, so I left the cream on a little longer for a cleaner result. About 6 minutes instead of to the instructed 5.
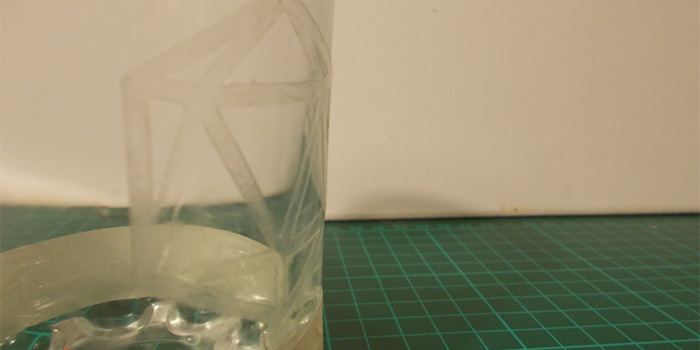
It was also unclear how much cream needed to be put on. I went with a coating thick enough to no longer be able to see through it, anything thinner gave me uneven results. The image below shows how thick it was.
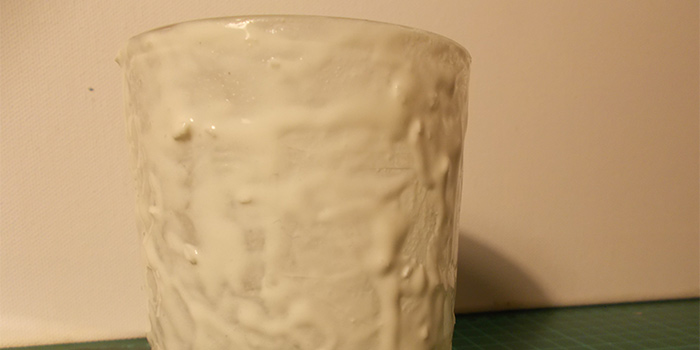
The cream I used also had sharp, glass-like pieces in it. You can see one in the image above, on the left side of the glass. These sometimes left small marks on the glass, so I made sure they either were removed from the cream (simply use your brush on a paper towel), or that they were on top of a stencil, which is the case in the image above.
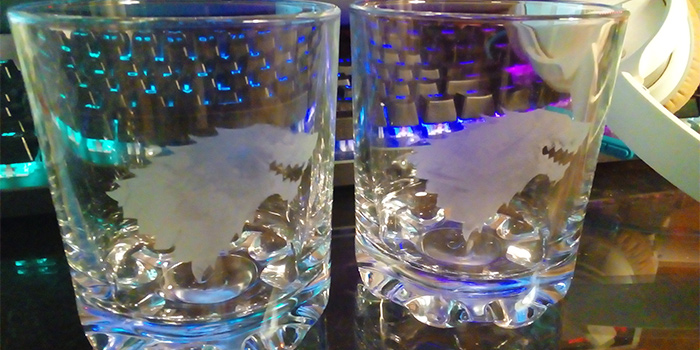
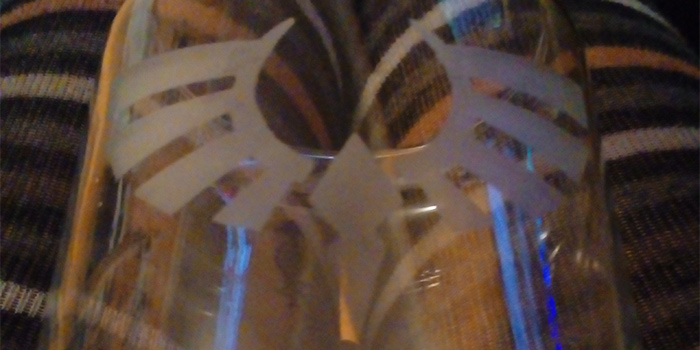
Assuming everything went well, you should have a glass with your design on it. Below are two more images to show some of the results I've had.
Final tips
I'll leave you with some final tips that helped me during my creations.
- Do a test run first. Grab a mason jar, a piece from a glass you may have dropped, or just a regular glass you don't mind altering. This'll give you a feel of everything, which really helped me during my creations.
- Buy second hand glasses. Depending on where you live, there's probably a charity shop or thrift shop around you with simple, cheap glasses. Ideal to cut costs, and to create cheap, yet amazing looking results with the bonus of recycling.
- Use straight glasses. Depending on your design, getting it on spherical glasses can be really difficult. It's definitely possible, just make sure the cream can't seep under your design anywhere.
- If you make a mistake, redo everything. Touching up missed bits just leads to a spotty result, so it's better to just redo everything, preferably with a different design. Using the inverted method mentioned earlier usually does the trick.
- Masking tape is your friend. With masking tape you can create easy straight lines (see the bottom of my dice result), but even with tape alone you can create great looking results. Tape off the top and bottom, fill in the center with cream, and poof! A more expensive looking glass from what could've been a 50 cent glass purchase.
- Customize more than just glasses. Mirrors are one option, but some creams can etch other materials too (like certain plastics), make sure you check the instructions for this though.