Feel free to share
 Using this site means trees will be planted. ^.^
(Find out more)
Making scented candles for tabletop games.
Scented candles can be a great asset to set the mood of a game, they don't just provide atmospheric light, but also tantalizing scents. Making these candles is incredibly easy, but there are some elements you may wish to keep in mind depending on how in-depth and professional you wish to get.
Either way they make for perfect gifts, mood lighting, scene setting tools, and are an all-round easy, but fun project to take up when you have half an hour or so to spare on a lazy Sunday.
Parental guidance: Hot wax, use of a heat source (microwave, stove, double boiler, etc.). The scents themselves can be hazardous (to eyes, mouths, etc.) as well (see their labels to make sure).
Difficulty: Easy to moderate.
Time: 30 minutes (depending on size and amount of candles)
Cost: Very cheap to moderately costly, depending on whether you buy molds, many scents, etc.
Materials: Wax, wicks, safe containers (for the actual candles), a pan/double boiler (to melt the wax in), clothing pin (or other object to hold the wick in place with), stove/microwave.
Optional materials: Scents, thermometer, colored dyes, molds, extras (see below).
- Instructions
- Wax Types
- Wick Types
- Scents
- Colors
- Molds
- Extras
- Testing
- Safety
- Tips & Tricks
- Recycling
- Scent Guide
Instructions
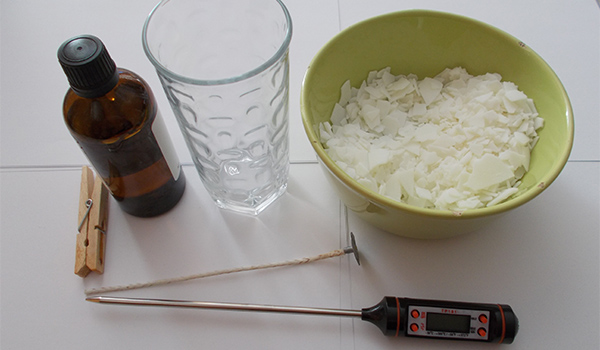
Without further delay, let's get started by first gathering all the items you need. Which is at least a type of wax, candle wicks, a container of sorts to melt the wax in, something to hold the wick in place with (glue, a clothing pin, etc.), whatever you wish to contain your candle (a glass, or a mold if you wish it to be free). Note that you need more wax than you can pour into the containers of your choice. I'm generally very generous with how much wax I melt, you can always re-melt leftover wax at a later time anyway.
Depending on what you wish to do with the candle you may also wish to gather scents (essential oils), dyes, a thermometer, and any extras you may wish to use to decorate or otherwise flourish up your candle, like glitters, strings, perhaps even dice hidden within the candle. Do make sure whatever you add is either non-flammable or not at risk of being exposed to the flames. Safety first.
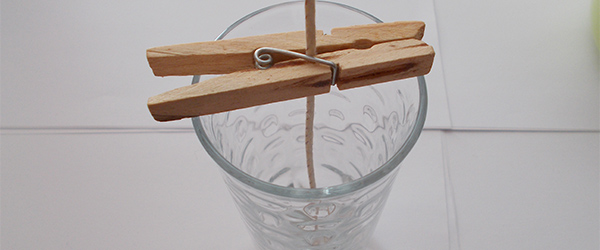
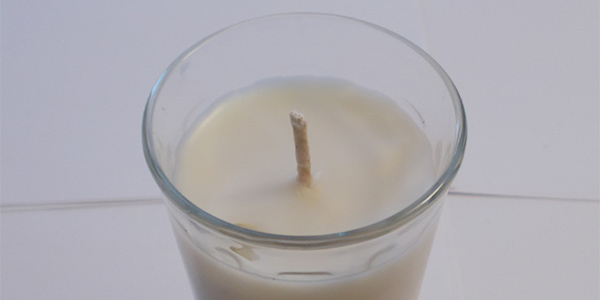
Once you've gathered all the required items first put the wick(s) into the container(s) of your choice. Some people prefer to glue it to the bottom with a glue gun, others prefer keeping it in place with items specifically designed to keep a wick in place, I prefer a simple clothing pin. It saves on the overall costs, plus I had them in my house already anyway, no point wasting materials.
If you wish to add anything to the bottom of the candle (stones, dice, etc.) add them now as well.
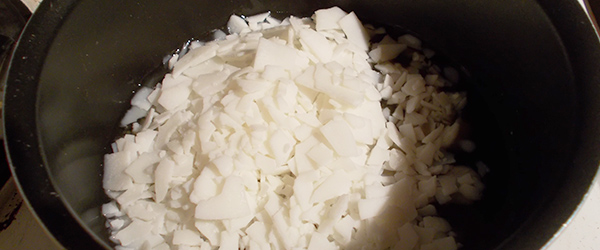
Once that's done, add the wax to a pan, double-boiler container, or microwave proof dish, turn up the heat gently, and wait for the wax to melt. If you use a microwave try 30 seconds at a time at moderate heat. I know every microwave is different, so I advice you to use caution initially. Wax can catch fire when it gets too hot (takes a while though), which is normally in the form of a small and gentle flame (like a candle), but it's obviously not something you want.
You can also now add the essential oils, and any desired dyes if you wish to keep things simple. How much you need to add is a difficult question to answer. It depends a lot on the brands you use, how strong you wish your candles to smell, how strong you wish the colors to be, and so on.
However, both scents and colors tend to be stronger when you put them in, then fade as the wax solidifies again. So you generally want to add a little more once you've reached a color and scent strength you like.
To be completely certain, try out a few smaller candles first.
For those who wish to step up the game just a little bit, use a thermometer to measure the heat of the wax. Once it reaches between 70-80 degrees Celsius or 160-175 degrees Fahrenheit take it off the heat, add the essential oils, and let it cool. At this temperature the scents are absorbed best. Does it make a huge difference? Yes, but it does depend on the scents, and on your nose.
Once the wax cools down to about 55-60 degrees Celsius or 130-140 degrees Fahrenheit start pouring it in the containers of your choice. At this temperature the wax sets better.
Thermometer or not, after this part all you have left to do is let the candles cool for about 3-4 hours, cut the wicks if needed, and enjoy your homemade candles. It is best to let the candles cool down slowly at room temperature, if you put it in the fridge or a similar cold place the wax could start to crack in some places.
If you poured the wax in a mold, make sure it is sufficiently cooled down before trying to take it out.
You're done! Told you it was easy. Now you can experiment with more scents, more colors, layered candles (pour one layer at a time, let them cool completely, then pour the next), various decorations, and so on.
Wax types
In general there are two types of wax you'll want to consider: soy and paraffin. These aren't the only types, but they are the cheapest, and therefore the more widely available, and more popular waxes out there. I will go over the advantages and disadvantages of these two, and the other 3 relatively common wax types below.
Paraffin
Paraffin wax is by far the most common wax out there. If you buy a candle in a store you're likely buying a paraffin one. What is paraffin though? Paraffin's a by-product derived mostly during the refinement of crude-oils. This means it's not very environmentally friendly, but since it is a by-product that would otherwise be thrown away you could still argue it's not a terrible product to buy. Since oil isn't going anywhere in the foreseeable future there will always be by-products, including paraffin.
The advantages of paraffin are its low cost, they should be odorless (assuming you buy good quality paraffin), it's harder than other waxes, and can thus be used for all sorts of candle types.
The disadvantages are that it burns quicker than other waxes, which in turn reduces some of its low cost advantage, more soot is produced than other waxes, and it sometimes causes (allergic) reactions to some people because of the air pollutants. These reactions are usually due to low quality paraffins, but it's still worth taking into account.
Soy
Soy wax is becoming more and more popular, and it's the wax I use. It's a processed form of soybean oil, and is therefore better for the environment. This is assuming it comes from sustainably grown soy of course, and it should be pure soy wax, as some are actually mixtures of soy and various additives.
The advantages of soy wax are its relative environmental friendliness, it burns slower (can last about twice as long as paraffin), burns cleaner (almost no soot), and it's cheap.
The disadvantages are its scent, which is faint, but somewhat noticeable, and its softer. I definitely recommend soy wax over all other waxes if you're looking for a great, but relatively cheap wax.
I personally enjoy the scent of soy wax, but if you're trying to go for a subtle scent with the ones you add the scent of soy can be interfering a little.
Beeswax
Beeswax is another relatively popular wax, but not as common as paraffin and soy. The main reason for this is its cost, as it's way more expensive than other waxes. Other advantages are its very slow burn, its clean burn, and its clean drip. A disadvantage, which could be seen as an advantage as well, is its scent. It's a strong honey aroma, which is hard to mix with other scents, but in and of itself very pleasant. This and its cost are its main, and to some only disadvantages. To some the use of bees can be a disadvantage, but its relative softness can be problematic as well for certain candle types and certain climates.
Palm wax
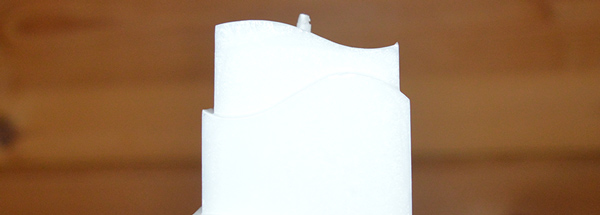
Palm wax is a less common wax, but, like soy, is 100% organic. It burns longer than soy, it's clean like soy, it's very firm, and it has a crystalline-esque pattern once it solidifies. This pattern can be seen as a disadvantage as well though.
Some of the disadvantages include its cost, it's a little harder to work with due to its relative brittleness, and it's not all that environmentally friendly. The reason for this is the fact that vast, vast amounts of forests are cut down to make space for palm oil plantations. The same goes for soy plantations to some extent, but palm is the worst culprit. I won't delve into the specifics in this guide, but it's worth keeping these things in mind.
Gel
Gel wax, patented as VersaGel by Penreco, is a gel with which you can make soft, rubbery, and see through candles. It's gorgeous when used right, and its transparent property can be used for some artistic looking candles, but its softness does prevent you from making large candles unsupported by a container.
The gel itself, which isn't a wax at all, is made of a mix of mineral oil and polymer resin.
Besides its artistic opportunities, advantages also include a clean burn, and the ability to carry a more powerful scent. But disadvantages include the difficulty to work with it, and its cost compared to the cheaper waxes.
Wick types
Wicks may seem like a relatively insignificant element of a candle, but it's actually a crucial part. The wick helps determine the size of the flame, how hot it burns, and thus how long the candle will last.
A wick acts as a delivery system, it'll drain the molten wax from the candle to its top, which is where the wax will burn. Some wicks will drain more wax than others.
Wicks are made from braided fibers, usually cotton or paper, which may sometimes have a stronger core made of cotton, paper, zinc, or tin. These cores help the wick to stand straight, which can be helpful.
The braid can also vary. Some are merely twisted around, while others are plaited, braided, or knitted. The twisted ones tend to be of poorer quality, and they tend to burn quicker as they fall apart more while burning. The difference between the plaited, braided, and knitted ones are minimal for every day candle making and use, so I wouldn't worry about them too much.
Scents
Candles are usually scented using essential oils, as these'll burn up with the wax, and release their fragrance in the air. It is still important to make sure the essential oils you buy are in fact essential oils, as some products are merely advertised as such, while having different properties. If they're not suitable for candle making they will burn with more waste products, which you obviously want to avoid.
Other than that you can pretty much go wild with all the various essential oils you can add. There are hundreds upon hundreds of scents ranging from regular scents like cinnamon, and vanilla, to combinations or vague names like summer afternoon, and forest breeze.
I've compiled a list of scents and their associations for this guide (link at the bottom), hopefully it'll help you build your RPG setting candles.
If you want to combine scents to form a bouquet, and hopefully a richer experience, you generally want to focus on frontal scents, background scents, and perhaps a few accents. Background scents are the heavier ones, like musk, and wood scents. Frontal scents are often the fresher smelling ones, like lemon, and various flowers. Accents can include a few drops of these fresher scents, as well as some of the in-between scents, like cinnamon, vanilla, and other scents that are neither fresh nor heavy like musk.
Color
Candles can be dyed all sorts of colors, but there are also a few different options when it comes to dye types. You will generally come across dye blocks, liquid dyes, powdered dyes, and dye chips. Of these, dye chips are probably the easiest to work with, as you simply add the chips to the melting wax.
Dye blocks are fairly easy as well, but since you have to cut or scrape off the quantity you wish it can be difficult to reproduce the same result over and over if you don't keep track of measurements.
Powdered dyes make this a little easier, and they're highly concentrated as well, so you only need a little to add a lot of color.
Liquid dyes are great too, but they can get messy as it's often easy to spill some on your fingers, the kitchen counter, and anything else you may have nearby. This does depend a lot on the packaging of these liquids, some simply have annoying lids that are near impossible to open without causing some abrupt movements, which then leads to the spilling. Those of you who have worked with food coloring in the past can probably attest to how messy even slightly liquid dyes can get.
Speaking of food dyes, do not use these for candles. The vast majority of food dyes are water based, but candles are oil based, so they won't mix at all. I definitely recommend using dyes made specifically for candle making, some might be a little pricier than other types of dyes, but they won't ruin a batch of wax, and therefore won't waste further money.
Lastly, you generally want to stick to liquid dyes when you're using gel instead of wax. The other dyes are often mixed with paraffin or other waxes, which will ruin the transparency of the gel.
Molds
Candle molds allow for some amazing looking candles with minimal effort. They can be bought online, usually aren't too expensive, and last a long time. The one thing you'll want to look out for is how the molds work. Some are flexible enough to squeeze or wiggle the candle out, others are solid, and either rely on the release of a vacuum or on the shrinking of the wax to release the entire candle. Not all waxes shrink however, the harder the wax the less it shrinks, and thus the harder it is to get it out of a solid mold.
You can usually still get them out with some light tapping, but if the mold itself isn't all that strong you'll want to refrain from doing this. Instead you could simply dip it in some hot water. The wax on the outside will slowly melt, which then allows it to slip out of the mold with ease. This usually doesn't ruin the candle, but if you have an intricate mold it might morph the patterns or shapes just a little.
Alternatively, popping the mold in the freezer could cause the wax to shrink enough to have it pop out with ease.
Extras
There's a lot you can do with candles to spice them up. I've mentioned adding stones or even dice at the bottom as a surprise, but you can add pictures to the sides of glass as well. To do so you either need pictures specifically designed for this purpose, or some differently colored wax with which you can create your own. Simply pour this wax over a wide surface so it ends up as a thin sheet, then cut out the shapes you need, stick them to the side of the glass (soft wax is sticky), and pour in the other wax. Make sure these homemade pictures weren't made with too thin a layer of wax, or they might melt into the wax you pour on it later.
You could also cover the sides of a finished candle in glitters, sand, or similar materials. To do this it helps to have a candle from a mold, as you can simply put it back into the mold, put it into a hot water bath to soften up the sides, then either roll it in the sand or press it against the sides.
Gel candles usually allow for more artistic freedom in terms of what you can add to the candle. Seashells, marbles, all sorts of things can be added to add a visual element to the candle itself. As mentioned before, make sure whatever you add isn't flammable, doesn't produce a horrible smell, pollute the air, or otherwise endanger your health, and the lives of those around you.
Testing
While the process of making a regular candle is very straight forward, you do want to test the candles you make, especially if you're going to use them as gifts. The amount of dye you use, the dye type, the amount of essential oils you use, the wick type, the wax type, these all contribute to how your candle burns. You don't want to end up with a candle that burns with a large flame, or with a candle that barely burns at all. So make a test version, light it, keep an eye on it, and see if you need to change anything.
Safety
Lit candles should never be left unattended, and they should be kept away from any flammable objects. The container you use for your candle should also be able to resist both the heat and the flame itself. Using an unsuitable container can cause it to either catch fire or to crack, which in turn will spill wax all over the place, and cause the wick to burn more intensely for a moment, which in turn can lead to a fire.
Keep in mind that even suitable containers can break, either eventually due to wear and tear, or sooner due to a production mistake. Either way a suitable container is not a guarantee of safety, which is a further reason to never leave candles unattended.
Tips & tricks
There are quite a few tips and tricks you could use to either make candle making easier, cheaper, more fun, or otherwise a more pleasant experience.
Setup
Clothing pins aren't the only cheap alternative to using actual wick centering tools. You can use anything you find in your house. Skewers, cutlery, string, folded paper, and so on. In some cases you might need some tape to hold the wick in place as well, but it rarely, if ever, has to come to buying wick centering tools.
Double boilers are a great tool as they allow for a more gradual and even melting of the wax, and thus give you slightly more control. You don't need to buy an actual double boiler however, simply put water in a pan, put the wax in a small pan with two handles, hang that pan inside the previous one, turn up the heat, and you're done.
The water in the big pan will evaporate, which in turn will heat up the pan hanging inside it. Make sure the water doesn't touch the hanging pan.
Coloring
If you want to test if you've put enough dye in the wax, simply pour a little bit of the colored wax into any container, let it cool, and check if you like the color. You can even put it into the freezer or a chilled container to speed up the process, any cracks that might occur because of this are irrelevant. You can then throw this test piece back into the other wax to remelt it.
Scents
Following the temperatures I mentioned earlier will ensure you get the most out of your scents. If the wax is too hot the scents could evaporate before everything's cooled down, and if the wax is too cold they might not mix properly. If they're not mixed you end up with an uneven distribution of scents as the candle burns.
Also note that the dyes you add can interfere with the strength of the scents.
Shrinkage
If you're using softer waxes, and see through containers, the shrinking of the wax can cause some undesired visual results. To prevent this try to allow the candle as much time as possible to cool down. The slower this process the less shrinking will occur.
You can wrap the candles in towels, leave them in warm water, keep them in a warm room, and so on.
Failed attempts
Made a mistake? No problem, simply break up the candle, and melt it all over again. This'll be difficult if you've made a mistake with a multicolored candle, but you might still be able to salvage pieces divided into each respective color. The pieces that are mixed could still be turned into a darker color, even brown candles can look great. Cinnamon scented candle anyone?
Cleaning
Cleaning wax can be a hassle, but if you let the wax cool down it'll be much easier to deal with. This is also why I prefer to use more wax than I need, the leftover wax will form a disk in the pan, which can then be removed easily, and reused at a later date.
Putting the pan or other container with wax in the freezer can also help. It'll make the wax brittle, cause it shrink, and thus make it much easier to remove.
Any remnants left in the pan can be removed easily by pouring boiling water in the pan, then letting the water cool down. The wax will melt, float to the top, then solidify as the water cools down. Simply scoop it from the surface, and you're done.
Whatever you do, do not poor liquid wax down the drains. It'll cool down, solidify, and thus clog up everything.
Recycling
There are many ways in which you can recycle during the candle making process. Reusing leftover wax, using containers you have around the house, using tools you have around the house instead of buying new ones, and so on.
You can even use unused, broken, or otherwise unwanted candles to make new ones. Simply melt them, it's that easy.
Candle containers can be as cheap as using leftover glass containers from products you might use daily already, like bread spreads, coffee beans, and so on. Do keep safety in mind though.
Scent guide
As mentioned earlier, I've compiled a list of scents based on associations, which will hopefully help you with creating candles for RPG settings. Simply click here to visit it. I've put it on a separate page to avoid this page from turning into a bigger scrolling fest than it already is.